
Gutter maintenance is a critical, yet often overlooked, chore for homeowners. A clean and functional gutter system is essential for diverting water away from your home’s roof, fascia, walls, and foundation, preventing costly water damage, leaks, and even basement flooding.
While the ideal frequency for cleaning depends on your property’s surroundings (especially the number of nearby trees), a general rule is to perform a thorough cleaning and inspection at least twice a year: in the late spring and late fall.
Here is your comprehensive step-by-step guide for seasonal gutter cleaning and inspection.
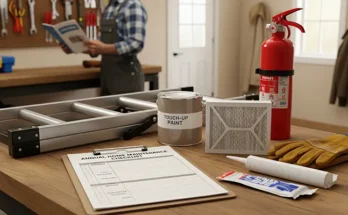
Preparation: Safety and Tools
Before climbing the ladder, prioritize safety and gather all necessary equipment.
Safety First
- Stable Ladder: Use a sturdy extension ladder that is tall enough to safely reach your gutters without overreaching. A ladder stabilizer or standoff arm is highly recommended to protect your gutters and increase stability.
- Buddy System: Have someone spot the ladder for you.
- Proper Gear: Wear heavy-duty work gloves (to protect from sharp debris and grime), safety goggles (to shield eyes from flying debris), and non-slip shoes.
- Dry Weather: Only work on a dry, calm day. Never clean gutters during or immediately after rain, or in high winds.
Essential Tools
- Extension Ladder (with stabilizer or standoff arm)
- Work Gloves and Safety Goggles
- Gutter Scoop or Small Trowel (plastic is best to avoid scratching the gutter)
- Bucket (with a hook to hang securely on the ladder or gutter) or sturdy trash bags
- Garden Hose (with a high-pressure nozzle)
- Plumber’s Snake or Hand Auger (for stubborn downspout clogs)
- Leaf Blower/Vacuum with Gutter Attachment (optional, for dry debris)
Step-by-Step Cleaning and Inspection Process
Follow these steps for a safe and effective clean:
Step 1: Clear the Debris
- Position the Ladder Safely: Place the ladder on level, firm ground. Ensure it extends at least three feet above the gutter line. Do not lean the ladder directly on the gutters.
- Manual Removal: Start near a downspout and, working in small sections, use your gutter scoop or gloved hands to remove all leaves, twigs, dirt, and any other built-up debris.
- Collect and Dispose: Place the debris into your hooked bucket or trash bag. Avoid dropping the debris onto the ground, especially near the foundation.
- Repeat: Carefully descend and reposition the ladder along the gutter run until all visible debris is removed.
Step 2: Flush the Gutters
- Water Test: Once the gutters are cleared of solid debris, use a garden hose with a nozzle to flush the entire system. Start at the highest point and work toward the downspout.
- Check for Leaks: As the water flows, watch for any overflow, leaks, or drips along the gutter run, seams, and end caps. Mark any areas that need sealing or repair.
- Ensure Proper Pitch: The water should flow smoothly toward the downspout. If water pools or stands in a section, the gutter may have an incorrect pitch (slope) and require adjustment.
Step 3: Unclog the Downspouts
- Test Downspout Flow: Observe the downspout exit point at ground level. Water should flow out quickly and freely.
- Clear Blockages: If the water is slow or non-existent, the downspout is clogged.
- Hose Blast: Try to blast the clog out from the top using the high-pressure hose nozzle.
- Plumber’s Snake: If the hose is ineffective, use a plumber’s snake or hand auger from the top or by removing a lower section of the downspout for better access.
- Flush Again: Once cleared, re-flush the downspout with the hose to ensure it’s completely open.
Step 4: Conduct a Full Inspection and Repair
After the system is clean, perform a detailed inspection of all components:
- Check for Damage: Look for rust, cracks, holes, or split seams in the gutter material. Small holes can be sealed with gutter sealant.
- Inspect Fasteners: Check that all gutter hangers, brackets, and spikes are secure. Re-secure any that are loose or pulling away from the fascia board. Sagging gutters often indicate loose fasteners.
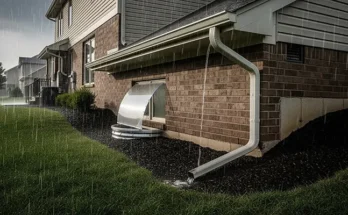
- Downspout Alignment: Ensure the downspout sections are tightly joined and the bottom extension is directing water at least 3-4 feet away from your home’s foundation.
- Inspect Adjacent Areas: Use this time to look for damaged, loose, or missing roof shingles directly above the gutters. Also, check the fascia board and siding for signs of water stains or peeling paint, which could indicate long-term overflow issues.
Seasonal Maintenance Tips
Gutter cleaning is most critical at two times of the year:
| Season | Ideal Timing | Primary Focus |
| Spring | Late Spring (After heavy spring pollen and final leaf/seed drop) | Removing winter debris, inspecting for damage caused by snow and ice (like ice dams), and preparing for heavy spring/summer rains. |
| Fall | Late Fall (After the majority of leaves have fallen) | Clearing the heavy accumulation of fall leaves and debris to prevent clogs that can lead to ice dams and blockages when winter snow and ice arrive. |
| Summer/Winter | Quarterly or After Major Storms (Optional) | Spot-checking for immediate blockages (summer storms) or monitoring for ice dams (winter). |
By committing to this seasonal cleaning and inspection ritual, you can protect your home from water damage, extend the lifespan of your roof and foundation, and enjoy peace of mind through every season. If your home is multi-story or you are uncomfortable on a ladder, hiring a professional is the safest and most efficient solution.